In our continuing series of HOWTOs, today we are walking through the user interface and seeing what questions we can answer in our new data, focusing on Netflow
Part 1: Getting Gravwell Installed in 2 Minutes
Part 2: Getting Data Into Gravwell
There's a ton of building blocks here and what I've found is that once you learn each, combining them together to get the answers you need is quick and fun.
Part 3: What is My Xbox Doing
Now that we have Netflow into the Gravwell instance there's a ton of questions we can answer. Since this is my home lab let's focus on what my systems are talking to externally.
The Gravwell Homepage
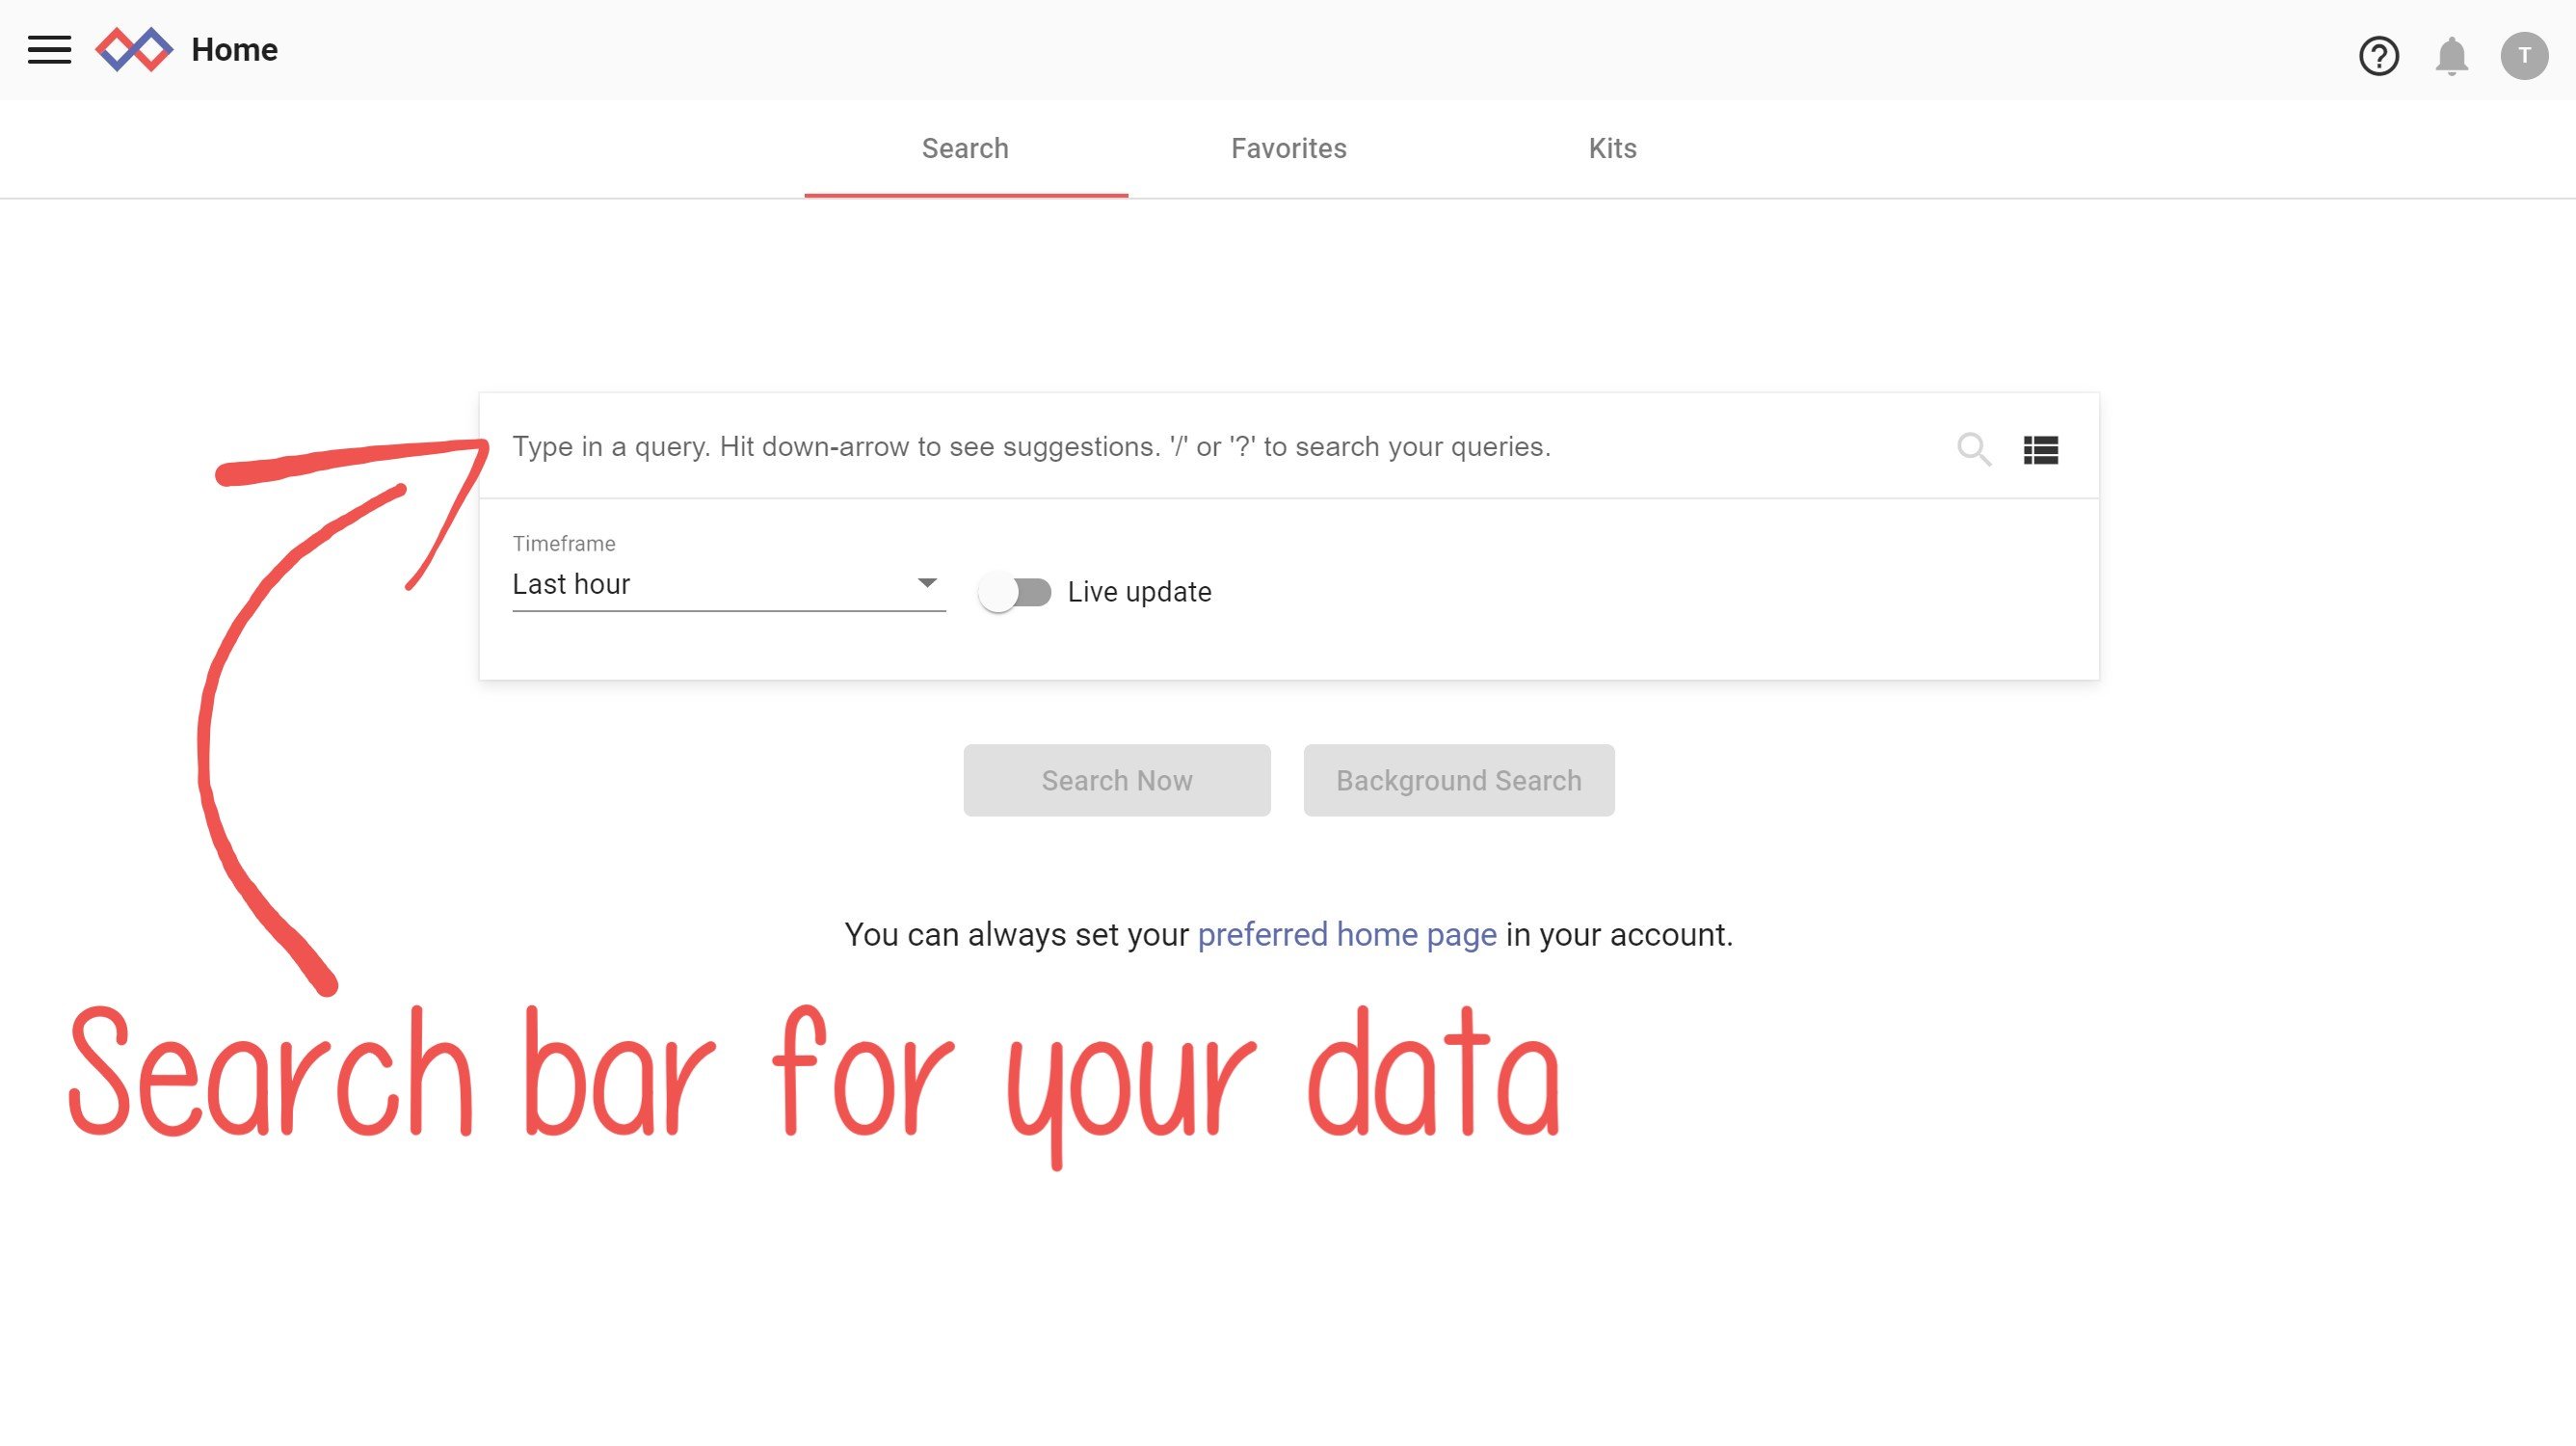
This is like the google search bar for all of your data. You can set the timeframe for your search, have it auto update on an interval, and see the history of your previous searches. Ever keep hitting the down arrow key in command line rather then retype? Yup...
If you would prefer to have your homepage as a dashboard or a certain query you can do so as well, but I'm getting ahead of myself. Let's talk about the exciting world of data.
Data Structure
In the last blog post we brought in 2 data types: Netflow and PCAP. We gave those data types the very creative tags of netflow and pcap. Collection of data occurs and a Gravwell Entry is created. Each entry includes: tag, source of the entry, timestamp and the data itself. Here's an example for netflow in my instance.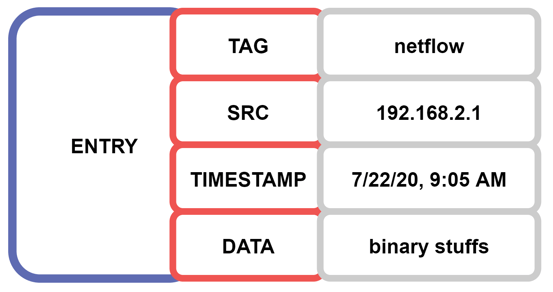
The DATA is where we can do awesome things. Each data type has one or more search modules that allows us to slice and dice that data, including binary data types like PCAP.
Base Query
BIG THING: There is no barrier to your data. It's just there, start querying
tag=netflow
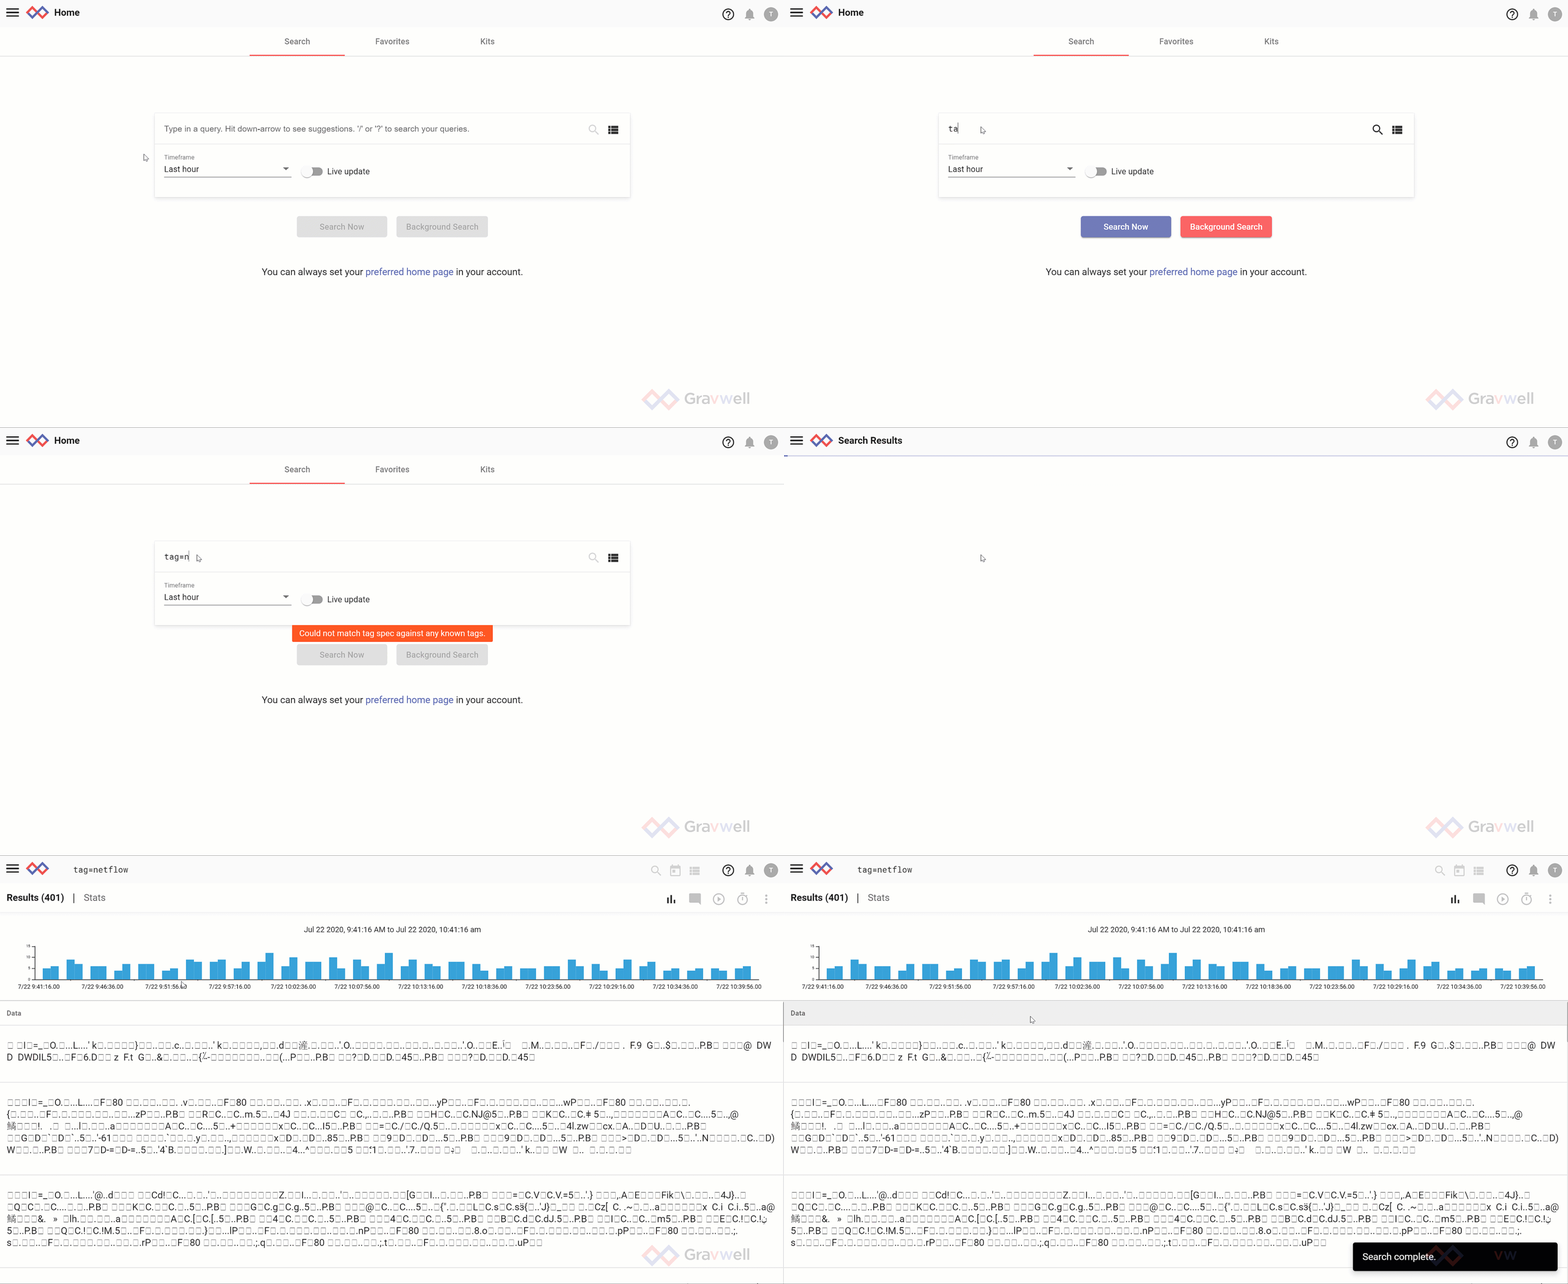
The most basic of queries is to just do a tag=<tag>. Let's build on that with search modules.
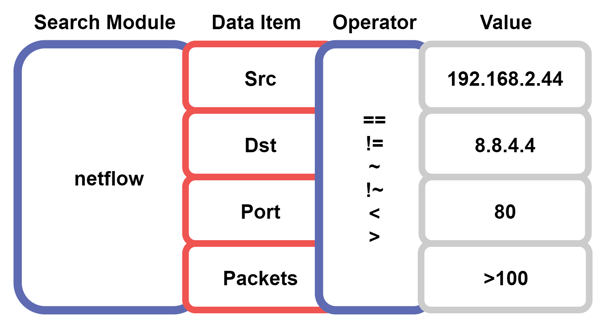 Depending on the search module, you have many options to parse the data. The diagram above gives just a few examples for netflow, all of which are documented here:Gravwell Docs- Netflow
Rendering
Another quick item to understand is rendering. A query will return results, but a render will format them in a way that's useful to the human. For this introduction we'll focus on Table, which, well, puts the data into a table.
Bringing Tag / Search / Render Together
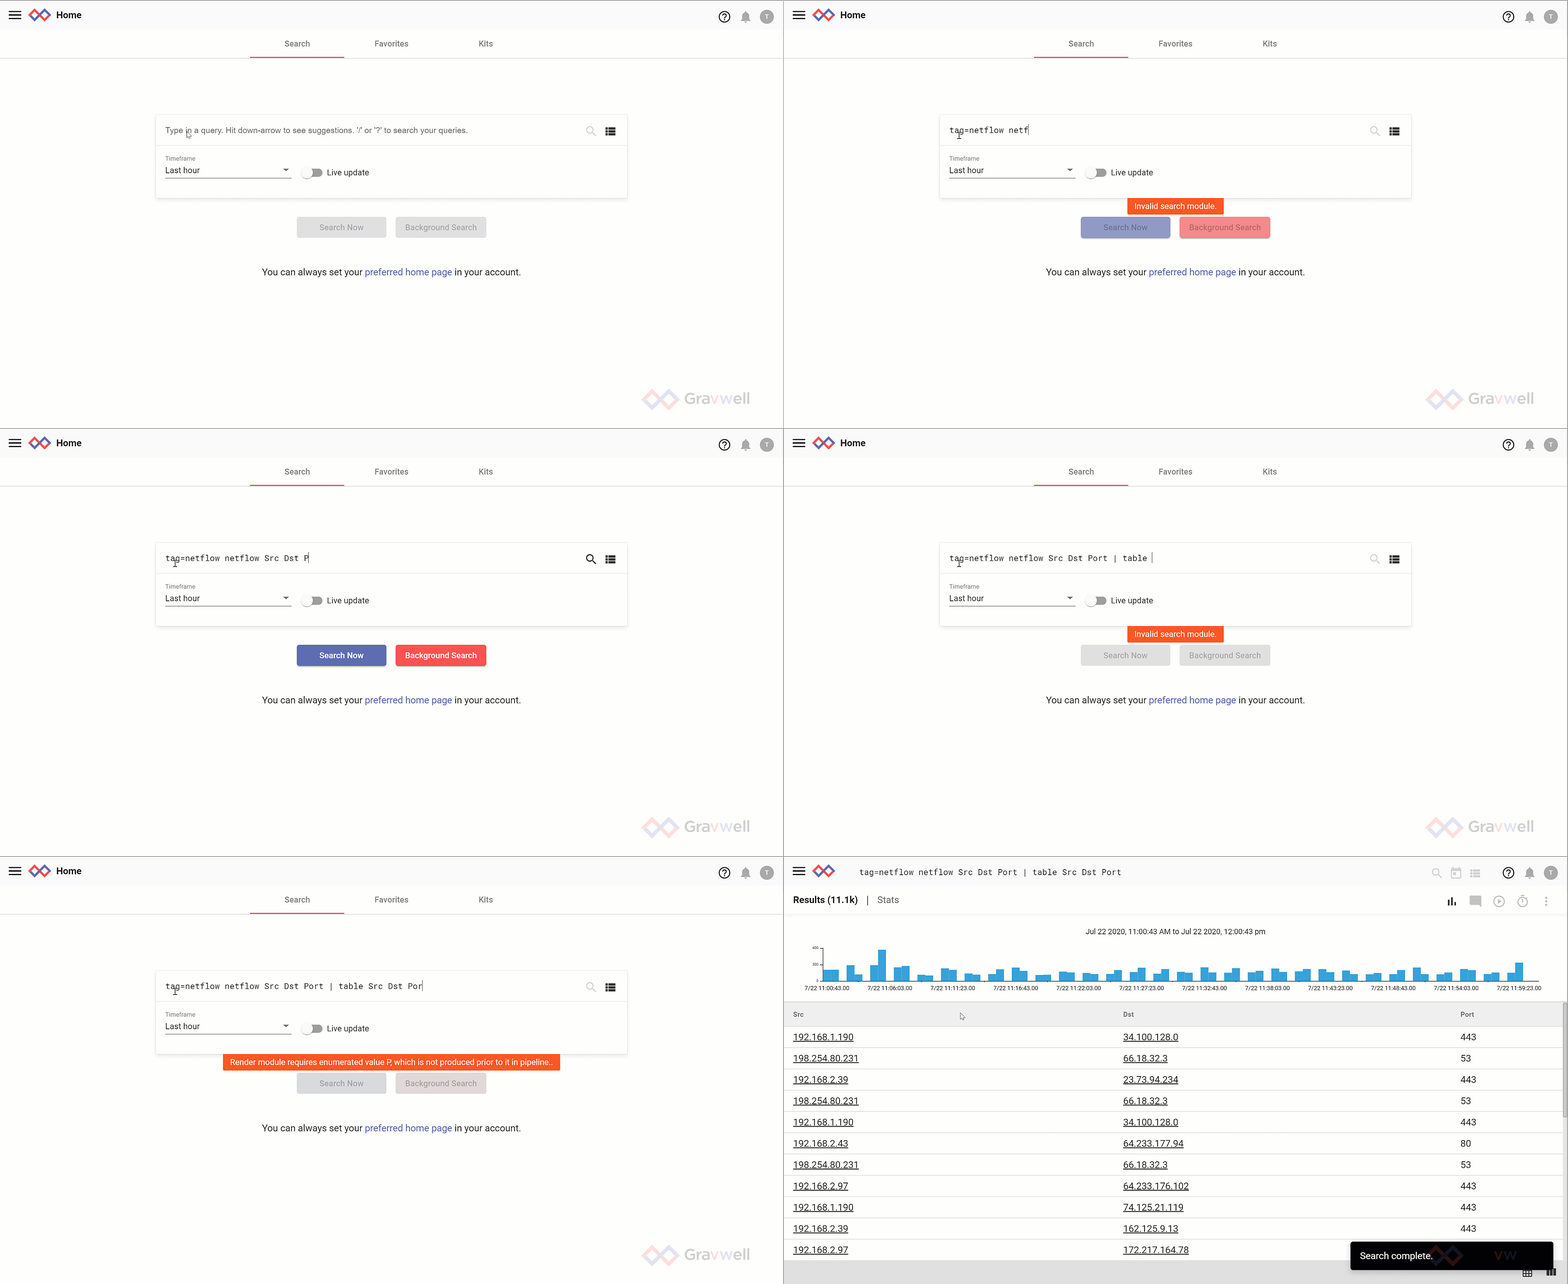
I want to investigate what my Xbox is really up to using netflow. Let's build some queries to answer some questions.
Starting Wide
tag=netflow netflow Src Dst Port | table Src Dst Port
Operators and Maths
Quick note about operators and maths, more information:
Quick Note-Math
| Operators | Maths | ||
| == | equals | Count | instances of records |
| != | not equals | Sum | adds values |
| ~ | subset | Unique | removes duplicates |
| !~ | not subset | Max/Min | Max and Min (duh) |
Let's Use Operators and Maths to Focustag=netflow netflow Src==192.168.2.44 Dst Port | unique Dst | table Src Dst Port
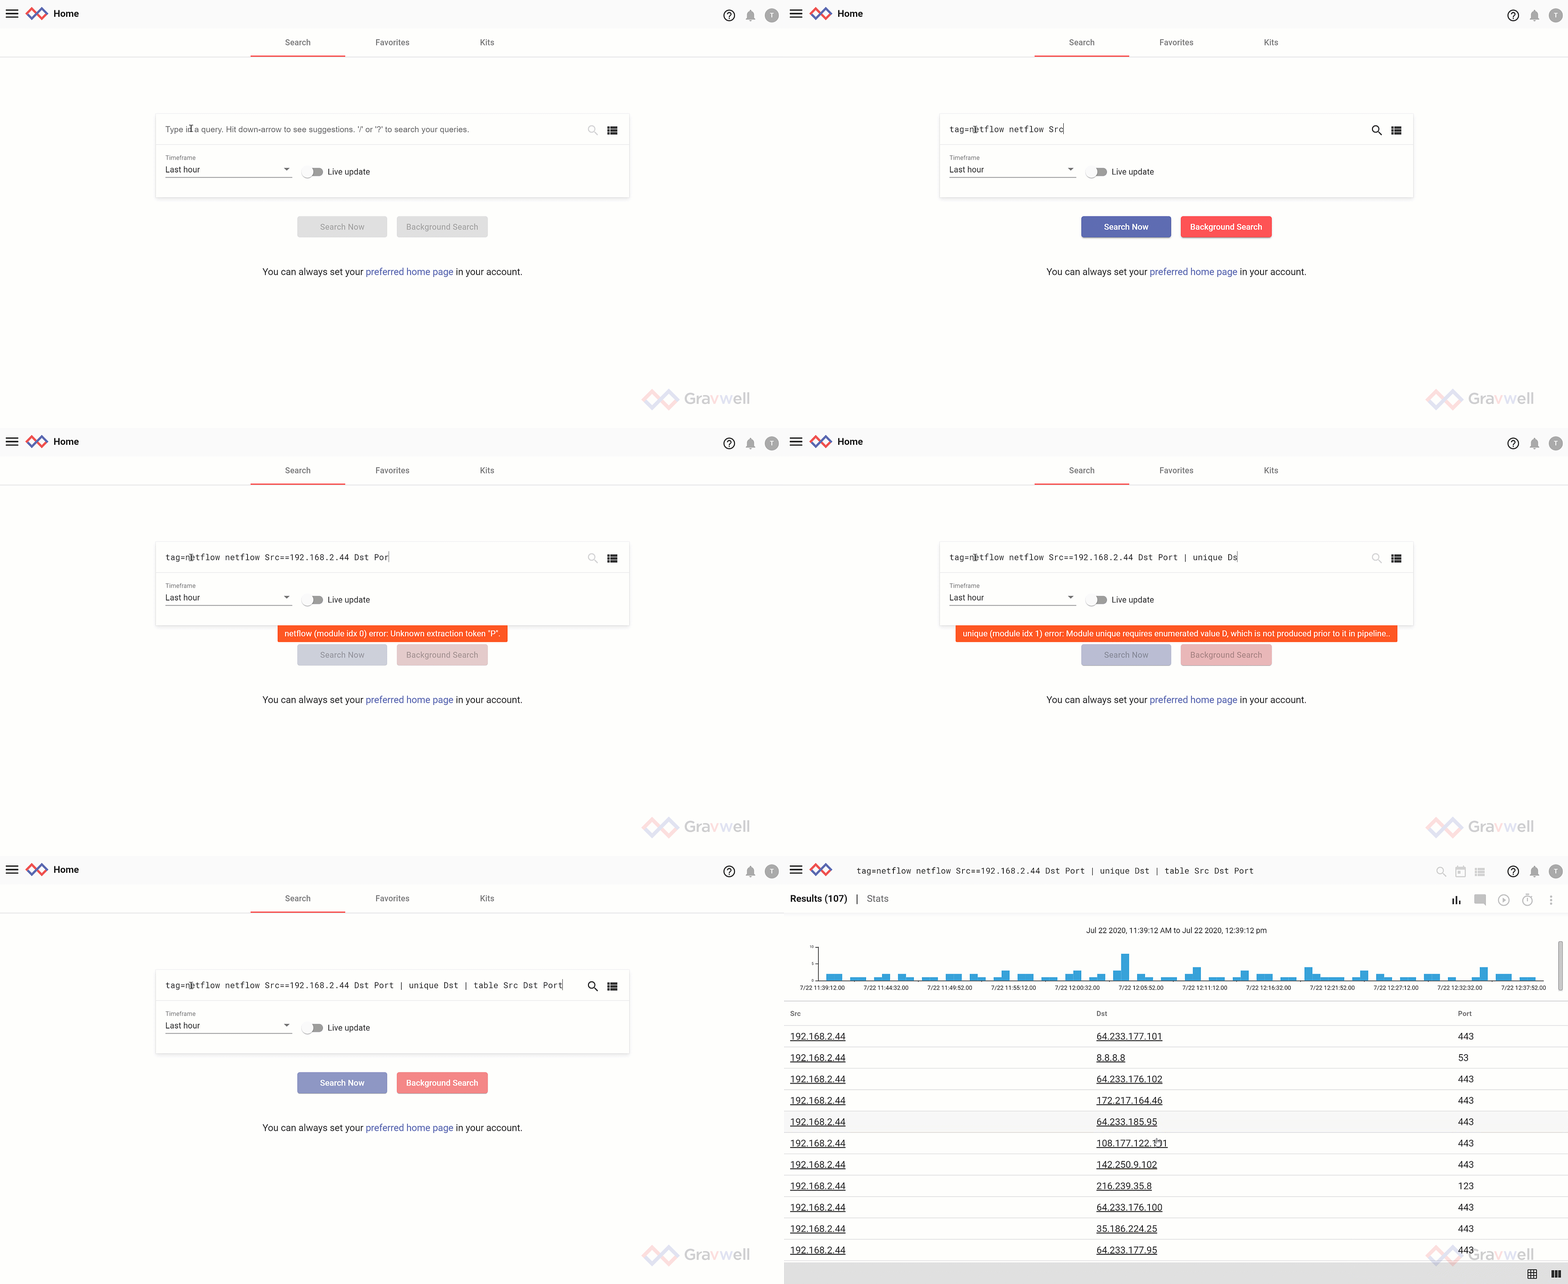
I now know who my Xbox is talking to and on what port. But we can start to build onto it so much more. Let's introduce resources.
Static Resources and Lookups
Enriching data with other data is the best. This data fusion allows you to take real-time or streaming data like Netflow and combine it with more static data like GeoIP or customer data sets. Gravwell ships with a number of these resources but adding your own is powerful. Some things like rack location, building number, owner, criticality are data points that often sit in CSV. Enriching your data easily allows you to answer tough questions.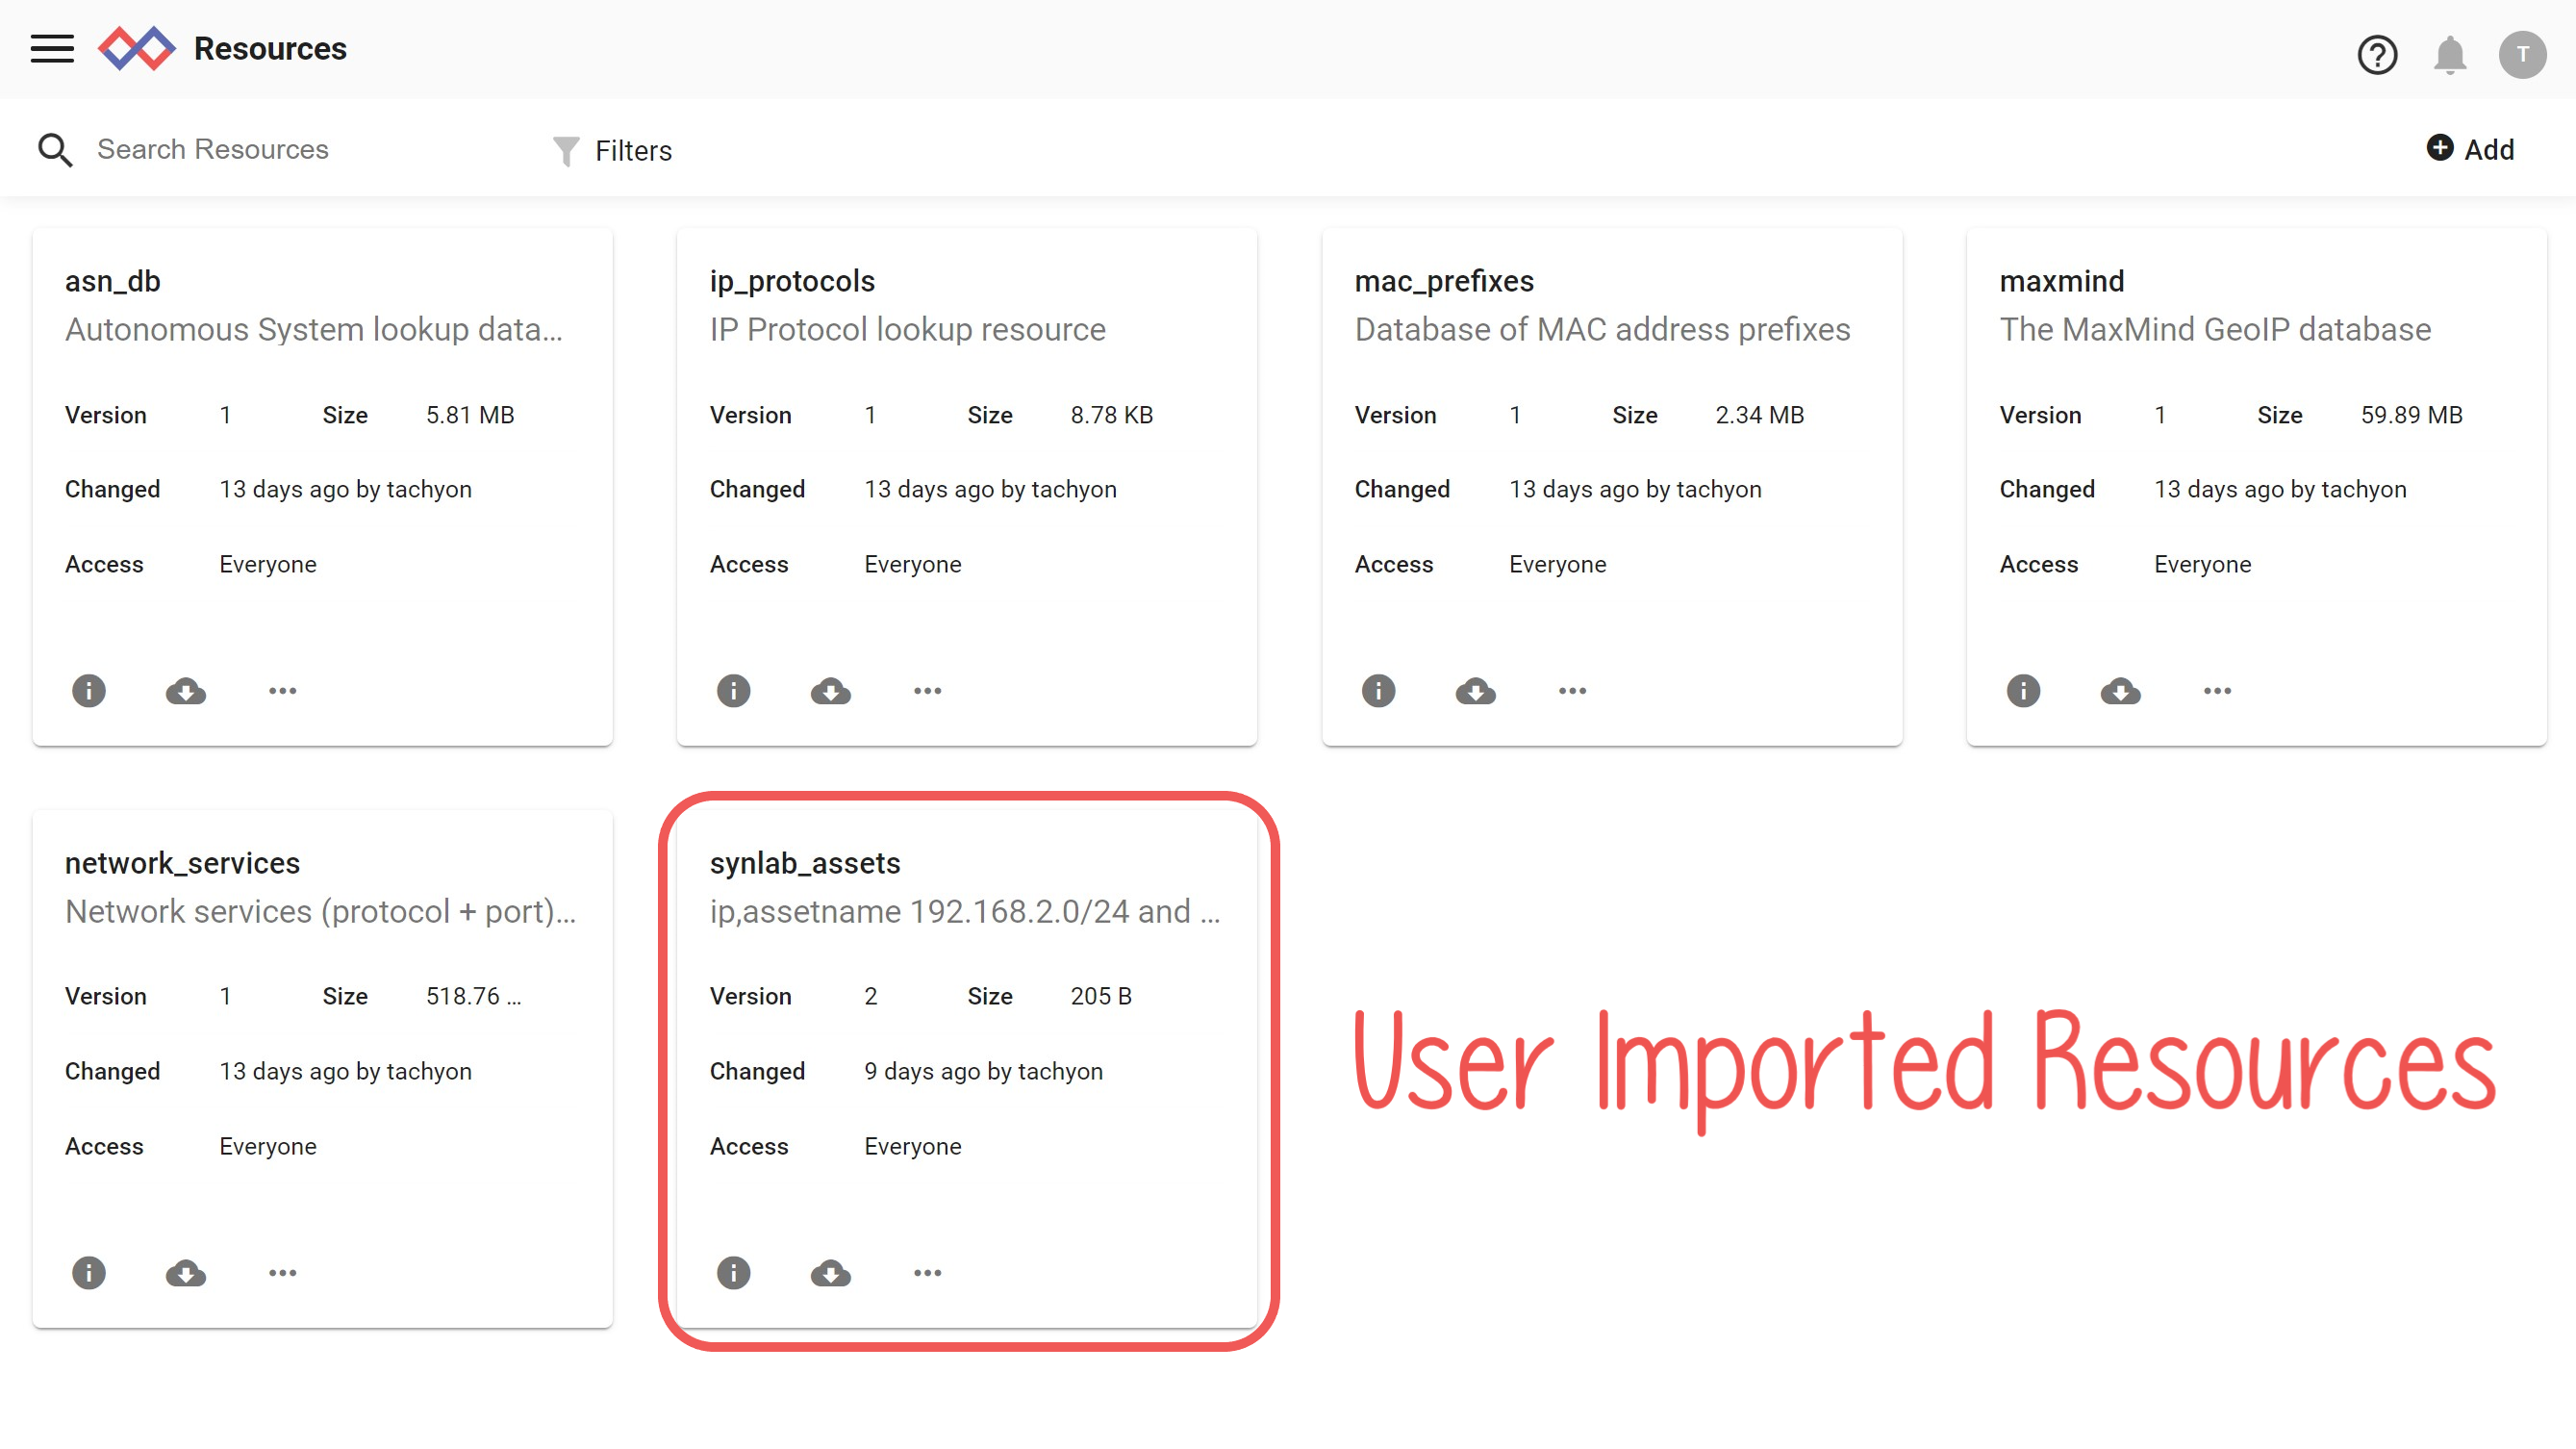
Lets continue to build on our query with Resources
My Xbox Destinations By Country
tag=netflow netflow Src==192.168.2.44 Dst Port
| unique Dst
| geoip -r asn_db Dst.ASNOrg
| geoip Dst.Country
| table Src Port Dst Country ASNOrg
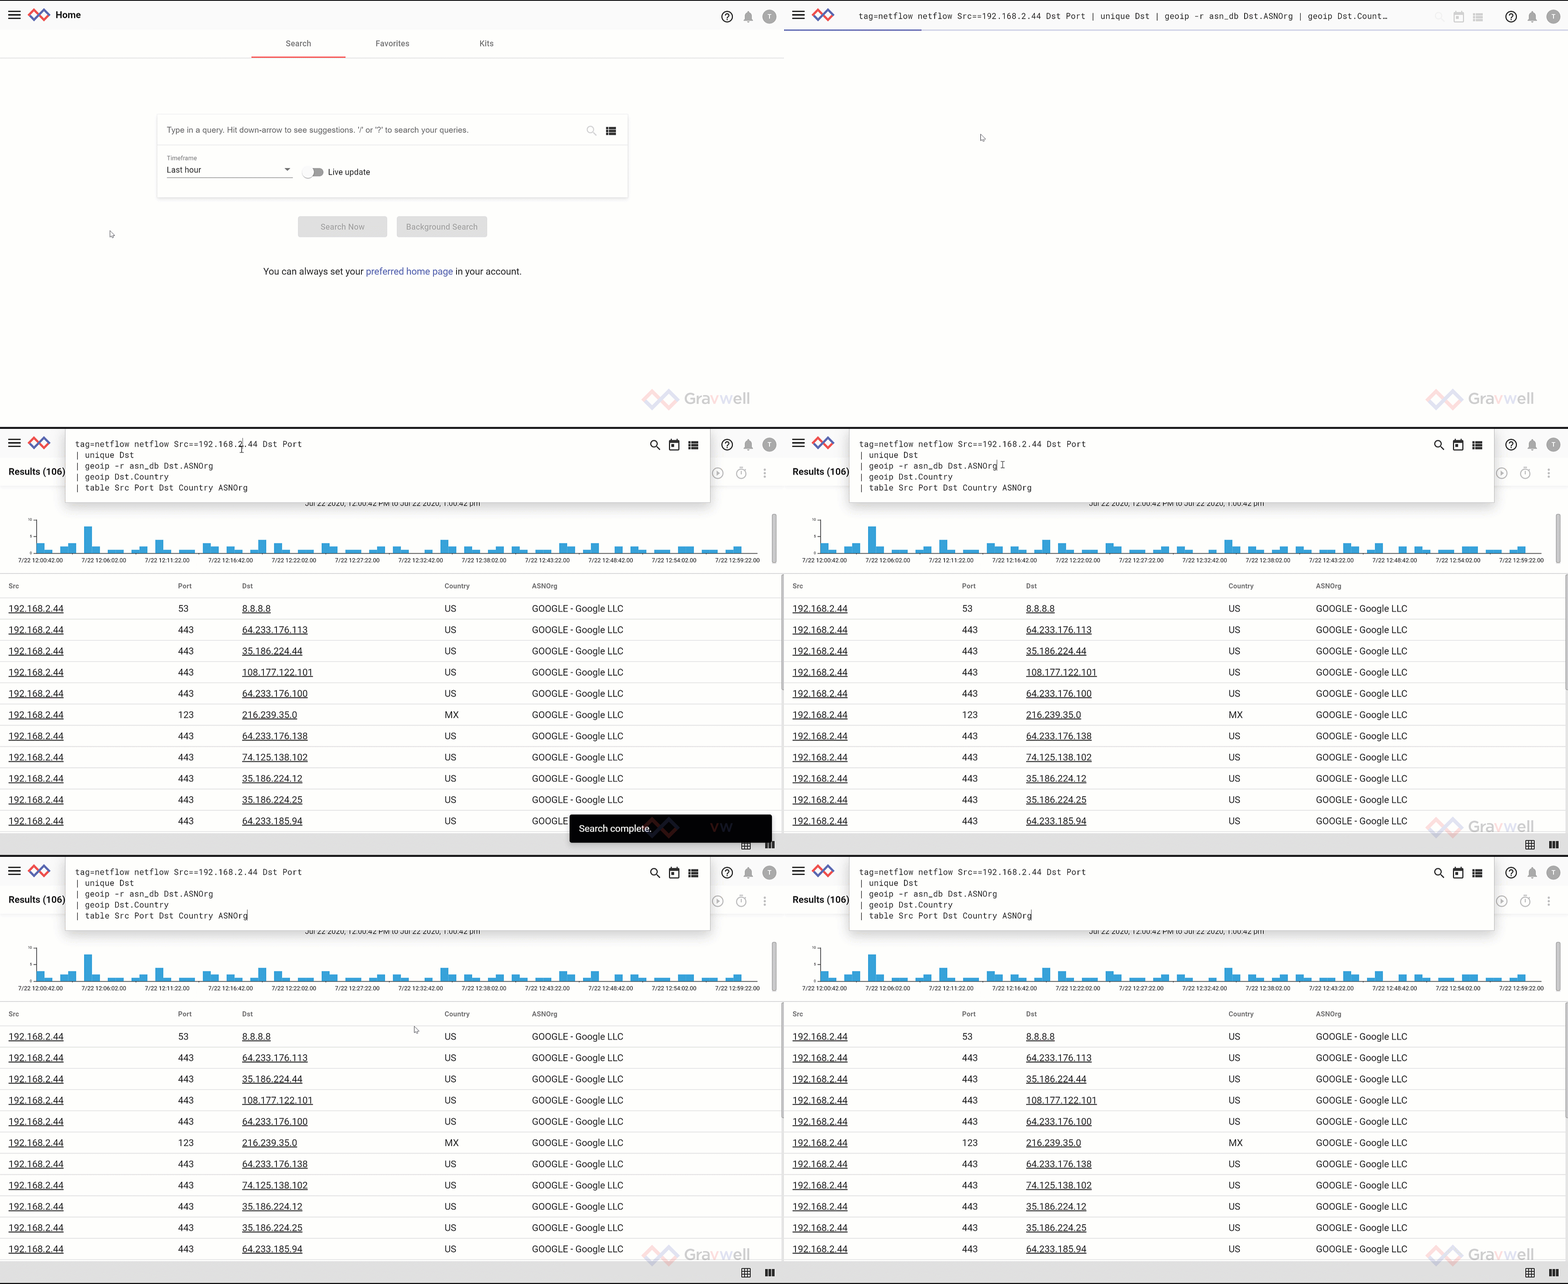
OK, so I cheated a bit with the copy pasta but let's break down the new query:

Continue to Combine!
Add operators to your add-ons. For instance adding !=US to the Dst.Country you have now just answered the question "where outside of the US has my Xbox been communicating with?"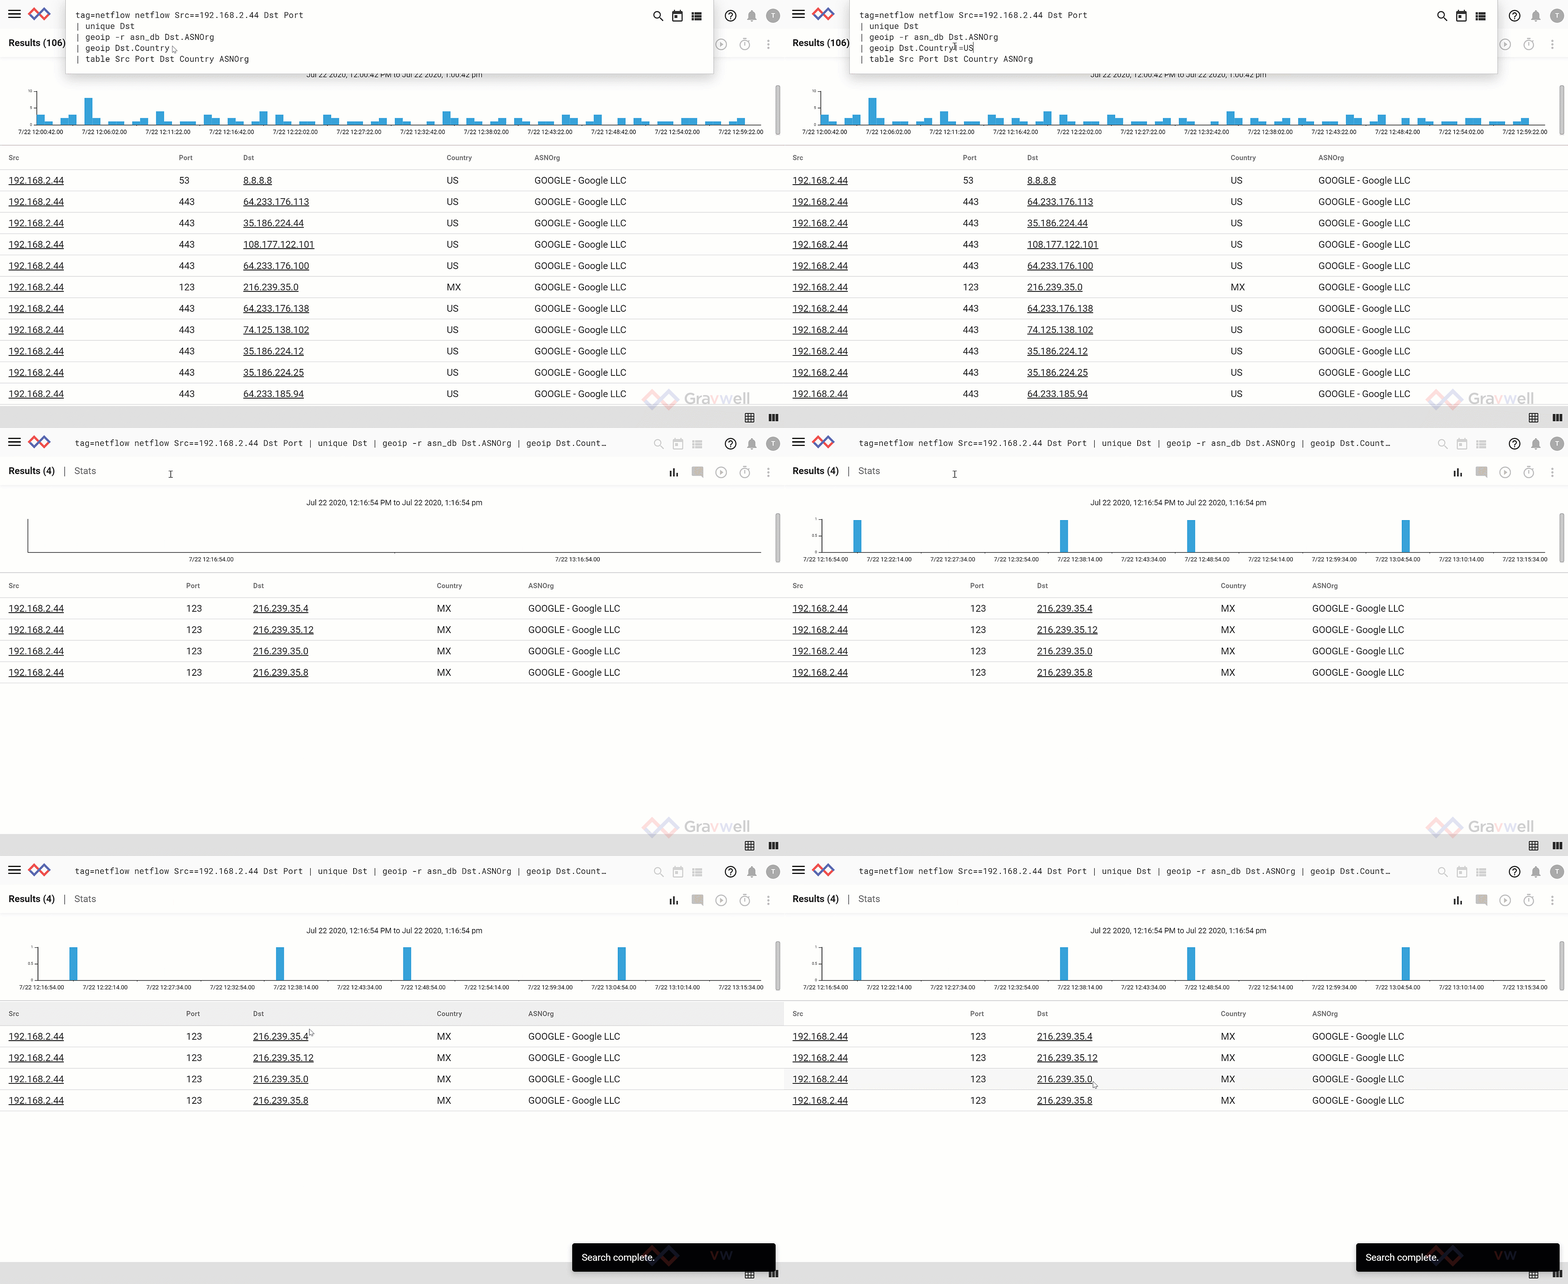
Tools to Help You and What's Up Next
There are a ton of useful functions built right into Gravwell, such as Saved Queries, Dashboard, Macros and Actionables, which we will continue to detail in more deeper dive blogs. But the big news is that in the Big Bang release we are bringing these creature comforts and starting points directly to you. Preset queries, dashboards, resources and playbooks to get you started on your way!
In Part 4 of the HOWTO blog series it's time to reveal all the cool new features in the Big Bang Release! If you'd like to follow along and see how Gravwell can empower you on your analytical journey, it's as easy as signing up for a free trial and giving it a try. 
Until next time!
