Gravwell's backup/restore functionality lets you save all your user-generated content (dashboards, resources, users) into a convenient tarball for restoration in case your server's disk crashes. Of course, for a backup to be truly useful, it needs to be frequent, which means it should be automated. In this blog post, we'll show a simple Gravwell script which can back up the system to Backblaze automatically.
Configuring Backblaze
For our backups, we're going to create a dedicated bucket in Backblaze, plus an app key so the script can access the Backblaze API on our behalf.
First, we create a bucket named "gravwell-backups", taking note of the bucket ID it shows after creation: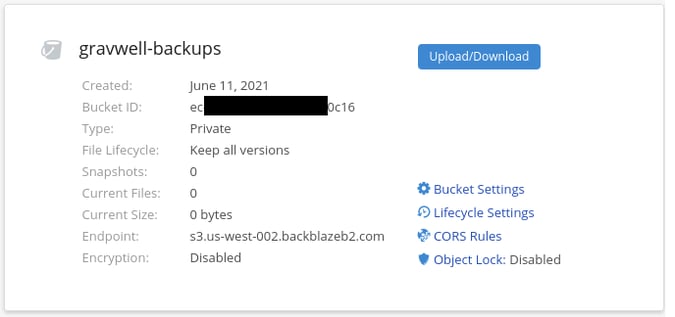
Then, we create a new app key, giving it read and write access to the new gravwell-backups bucket. Be aware that when you create the app key, Backblaze will show you two random numbers: a Key ID, and an Application Key. The Application Key is essentially a password and will never be displayed again, so be sure to copy it down somewhere!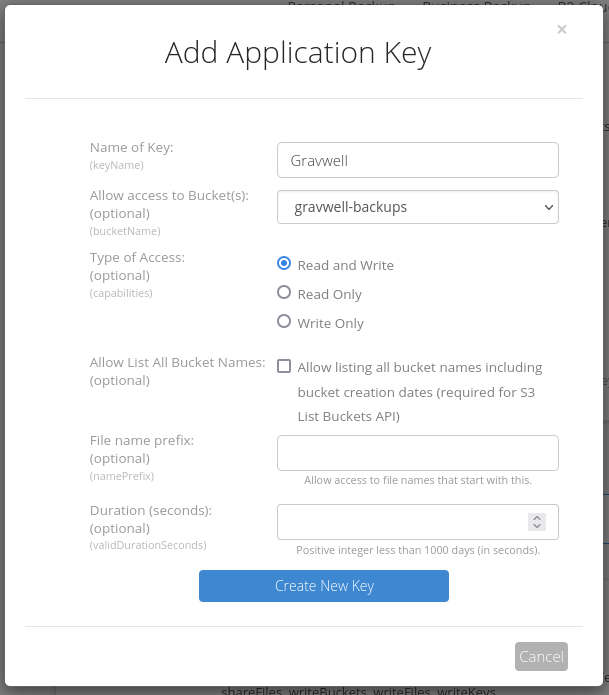
That's all you need to do on the Backblaze side. Now, we set up the script on Gravwell.
Deploying the Script
The script is perhaps a bit long, but it's really a straight-forward sequence of operations. Open Gravwell's Automation - Scripts menu:
Then create a new script and populate the description and the schedule; the default, running nightly, is a good choice: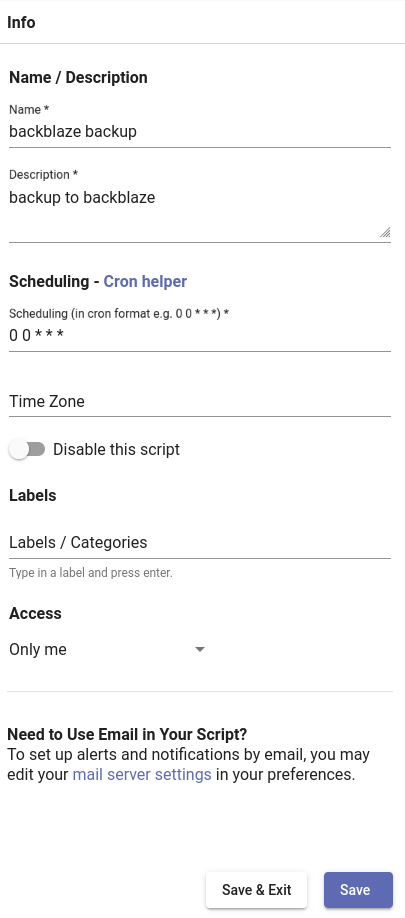
Now paste the following into the script field on the left hand side and change theBUCKET_ID, KEY_ID, andAPPLICATION_IDfields. It goes without saying that the values shown here do not correspond to any valid buckets or keys:
# Set the basic backblaze parameters
BUCKET_ID="ecd7ce9fe375ebb47c930c16"
KEY_ID="002c7ef65a4c3c60000000002"
APPLICATION_KEY="K102Qbx2lmxqyOQeCeoHI4dwqjpFNeo"

var http = import("net/http")
var bytes = import("bytes")
var ioutil = import("io/ioutil")
var io = import("io")
var time = import("time")
var json = import("encoding/json")
var fmt = import("fmt")
var sha1 = import("crypto/sha1")
######################################################
# First, we fetch a backup from Gravwell.
cli = getClient()
cli.SetRequestTimeout(20 * time.Second)
backupBytes = new(bytes.Buffer)
err = cli.Backup(backupBytes, false)
if err != nil {
return err
}
hsh = sha1.New()
hsh.Write(backupBytes.Bytes())
backupSum = fmt.Sprintf("%x", hsh.Sum(nil))
######################################################
# Now we authenticate to Backblaze.
req, err = http.NewRequest("GET", "https://api.backblazeb2.com/b2api/v2/b2_authorize_account", nil)
if err != nil {
return err
}
# Set the HTTP Basic Auth params
req.SetBasicAuth(KEY_ID, APPLICATION_KEY)
# Fire off the request
resp, err = http.DefaultClient.Do(req)
if err != nil {
return err
}
body, err = ioutil.ReadAll(resp.Body)
if err != nil {
return err
}

result = make(map[string]interface)
err = json.Unmarshal(body, &result)
if err != nil {
return err
}
# Extract the authorization token from the response
authToken = result["authorizationToken"]
# Also grab a URL where we should submit further requests.
apiUrl = result["apiUrl"]
######################################################
# Next, request a URL to upload to.
# We submit the request to the apiUrl we just got.
path = apiUrl + "/b2api/v2/b2_get_upload_url"
data = fmt.Sprintf(`{"bucketId": "%s"}`, BUCKET_ID)
req, err = http.NewRequest("POST", path, bytes.NewBuffer(data))
if err != nil {
return err
}
# Add the auth header
req.Header.Add("Authorization", authToken)
resp, err = http.DefaultClient.Do(req)
if err != nil {
return err
}
body, err = ioutil.ReadAll(resp.Body)
if err != nil {
return err
}

err = json.Unmarshal(body, &result)
if err != nil {
return err
}
# Here we get a token specifically for uploading the file,
# and the URL we should upload to.
uploadAuthToken = result["authorizationToken"]
uploadUrl = result["uploadUrl"]
######################################################
# Finally, do the upload.
# It's a POST to the URL we just got, with parameters set in the headers.
req, err = http.NewRequest("POST", uploadUrl, backupBytes)
if err != nil {
return err
}
# Add the auth header
req.Header.Add("Authorization", uploadAuthToken)
# Add the file name, hash, and content type
req.Header.Add("X-Bz-File-Name", fmt.Sprintf("gravwell-backup-%v.tgz", time.Now().Format("2Jan2006_15:04:05")))
req.Header.Add("Content-Type", "application/octet-stream")
req.Header.Add("X-Bz-Content-Sha1", backupSum)
# Do the request
tick()
client = make(http.Client)
resp, err = client.Do(req)
if err != nil {
return err
}
Click save, then click the checkmark on the right-hand column to open the debugging pane. Clicking "Debug" will run the script, and provided you've filled in the variables correctly, should create your first backup! Be aware that it may take a minute or two for Backblaze's web GUI to "notice" the new file when browsing, so be patient.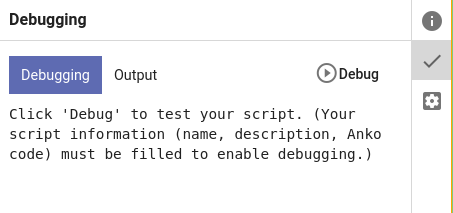
Script Summary
The script has four "phases": fetching the backup, authenticating to Backblaze, getting an upload URL, and uploading.
Fetching the backup is pretty straightforward: we use thegetClient()function to get a Gravwell client object directly, then call theBackupmethod on it to fetch the backup archive. We increase the timeout on the client because backup archives can be rather large and we want to make sure there's plenty of time for Gravwell to build the archive, compress it, and ship it across the network to the search agent. We also compute the SHA1 hash of the file for later use.
Next, we authenticate to Backblaze via a GET request on their b2_authorize_account endpoint, setting our application key and key ID as parameters for HTTP Basic Authentication. The body of the response is a JSON structure containing, among other things, an auth token to be used in further requests and an API URL where we should send our requests.
In order to upload a file to Backblaze, you must first request an upload URL. We send a POST request to theb2_get_upload_urlAPI on the URL we received from the authentication response, sending the desired bucket ID in the body of the request and setting the authentication token in anAuthenticationheader. The response to this request has a temporary URL which we will use to upload the actual file, and an authentication token specifically to use for uploading.
Finally, we can upload the file itself. This is a POST request to the URL from the previous request, with several headers set to define the destination file name, the content type, and the SHA1 hash of the backup file we computed earlier. The body of the request is just the contents of the backup.
Note: Gravwell takes measures to prevent scripts from running away in infinite loops. If a script goes more than 30 seconds between certain operations, Gravwell will attempt to kill the script as soon as possible. Depending on the speed of your network and the size of the backup you're uploading, it's entirely possible that the final upload step may take over 30 seconds. Gravwell will not stop the upload, but it will report an error on the execution of the script. If you see errors like "script exceeded max time between operations", check your Backblaze bucket; as long as the backups are there, you can safely ignore the error.
Conclusion
Gravwell's scripting system allows huge flexibility for the inventive administrator; you can build your own integrations with third-party services at will. If you're not quite so adventurous, we're also happy to help our customers develop these integrations. Contact Gravwell sales to set up a free no-limits evaluation, or just grab our free Community Edition and try things for yourself!