Version 3.7.0 of the Gravwell open source repository introduces an exciting new feature: a Go library for interacting directly with Gravwell! Our Data Fusion platform has always been about meeting custom analytics needs and not forcing clients onto limited rails for dashboarding, searching, etc. Out-of-the-box only gets you so far, and beyond is where our customers get into doing some really, really cool stuff.
Open sourcing the Gravwell client library makes it much faster for users to get any custom code up and running - which means less time to ingestion, automation, alerting, and other juicy data goodness. This post will show how to instantiate & authenticate a client, then give a few examples of what you can do.
This library exposes interfaces to all of Gravwell's web APIs, meaning you can write programs to run queries, manage users, ingest data, peruse search history, install & manage kits, and more. The client library documentation describes the functions available in full detail. Complete source for the examples shown here can be found at github.com/floren/gravclient-examples.
Creating a Client
In order to interact with a Gravwell webserver, you need to instantiate a client object. There are a few steps to get the client fully authenticated and ready to use. First, callclient.NewClientto create the object. This function takes four arguments: the host+port of the Gravwell server, a boolean to use HTTPS or not, a boolean to validate TLS certs or not, and an optional logger.
After creating the client object, you call theLoginfunction, giving it a username and password for the Gravwell system. Following a successful login, you should typically call theSyncfunction, which fetches a little basic information from Gravwell and stores it inside the client object.
Here's a snippet which demonstrates those steps:
// For simplicity, we ignore cert validity (self-signed ok)
c, err := client.NewClient("localhost:80", false, false, &objlog.NilObjLogger{})
if err != nil {
    log.Fatalf("NewClient failed: %v", err)
}
defer c.Close()

// Log in
if err = c.Login("admin", "changeme"); err != nil {
    log.Fatalf("Login failed: %v", err)
}

// Call Sync to update client internal data
if err = c.Sync(); err != nil {
    log.Fatalf("Sync failed: %v", err)
}
At this point, you can start using the client object.
Running Queries
Once you have a client, it's easy to run a search. For basic synchronous queries, you'll want to callStartSearchto launch the search, then callWaitForSearch, which blocks until the search is complete. Once the search is done, you can callGetTextResults(or the appropriate function for the particular renderer used in your search) to get the results. Here's an example using the text renderer which prints the number of entries over the last hour:
end := time.Now()
start := end.Add(-1 * time.Hour)
s, err := c.StartSearch("tag=* count | text", start, end, false)
if err != nil {
log.Fatalf("Failed to start search: %v", err)
}

if err = c.WaitForSearch(s); err != nil {
log.Fatalf("Failed to wait for search: %v", err)
}

results, err := c.GetTextResults(s, 0, 10)
if err != nil {
log.Fatalf("Failed to get results: %v", err)
}

// Now print the results
for _, r := range results.Entries {
fmt.Println(string(r.Data))
}
We can use the client library to write tools which interact with Unix utilities. The "barchart" directory in the example repository contains a small program which runs a query using the chart renderer and formats the results as input for the gnuplot graphing utility. The portion of the code which formats chart results into gnuplot input commands is shown below:
// Grab the results, requesting only 1 result so it gets condense to a single result
results, err := c.GetChartTsRange(s, start, end, 0, 1)
if err != nil {
    log.Fatalf("Failed to get results: %v", err)
}

// Print gnuplot preamble
fmt.Printf("set terminal png\n")
fmt.Printf("set boxwidth 0.5\n")
fmt.Printf("set style fill solid\n")
fmt.Printf("set title \"%v\"\n", *title)
fmt.Printf("set nokey\n")

// Generate a here document
r := results.Entries
if len(r.Values) != 1 {
    log.Fatalf("Got too many results: %v, expected 1", len(r.Values))
}
fmt.Printf("$data << EOD\n")
for i, v := range r.Names {
    fmt.Printf("%v %v %v\n", i, v, r.Values[0].Data[i])
}
fmt.Printf("EOD\n")
// And issue the plot command
fmt.Printf("plot $data using 1:3:xtic(2) with boxes\n")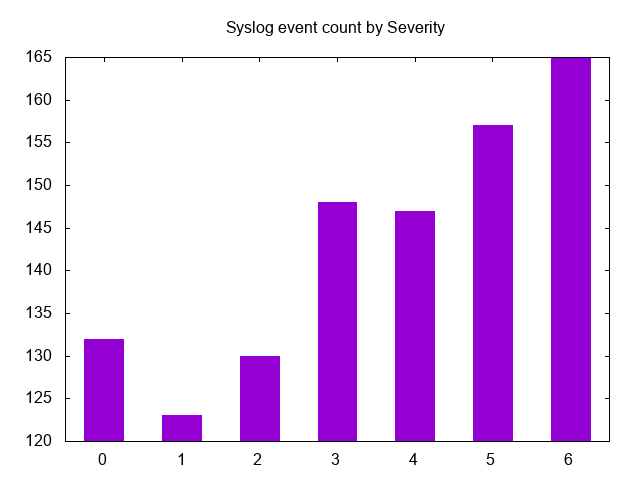
Created using gnuplot graphing utility
Implementing Backup/Restore
Gravwell recently added a neat feature: backup/restore. You can backup every object on a Gravwell webserver (dashboards, users, scheduled searches, macros, autoextractors, and so on) to a file. Restoring that file on a webserver wipes whatever is currently on the webserver and replaces it with the contents of the backup. It's an easy way to migrate a setup or just to safeguard yourself against a disk failure.
Given an authenticated client object (as shown above), it's quite easy to create a backup:
f, err := os.Create("/tmp/gravwell.bak")
if err != nil {
    log.Fatalf("Couldn't create output file: %v", err)
}
defer f.Close()

if err = c.Backup(f, true); err != nil {
    log.Fatalf("Backup failed: %v", err)
}
And just as easy to restore it:
f, err := os.Open("tmp/gravwell.bak")
if err != nil {
    log.Fatalf("Couldn't open input file: %v", err)
}
defer f.Close()

if err = c.Restore(f); err != nil {
    log.Fatalf("Restore failed: %v", err)
}
Conclusion
In the limited space of a blog post, we must stick to simple examples, but hopefully they serve to demonstrate the possibilities of the new open source client library. We'll be creating additional documentation and tools using the library, so watch this blog and our Twitter account! If you have any questions or would like to see the full Gravwell data fusion platform in action, click the button below and one of our Gravwell Guides will be in touch to get that scheduled.